

Host Files On Blogger Using Google Code

Blogger is in the cloud, so it offers fewer opportunities to its users to host different kinds of files on their website. In other words, you can say that Blogger does not provide a Free Hosting where users can upload core files of their website like JavaScript and CSS files. Keeping that in mind previously, we discussed how you can Host CSS files in Blogger. Therefore, today in this article, we will show you How to Host files on Google Code in Blogger.
What is Google Code?
Google Code is a platform setup for Developers. It is a home of developers where they can upload their APIs and other technical stuff. This site provides a variety of different options, which helps a developer to develop a better application. The perks of using Google code are priceless because they are the only organization which provides you Free Hosting with unlimited bandwidth. Few people consider it as the magical portion for a hardworking developer.
How to Host JavaScript Files on Google Code?
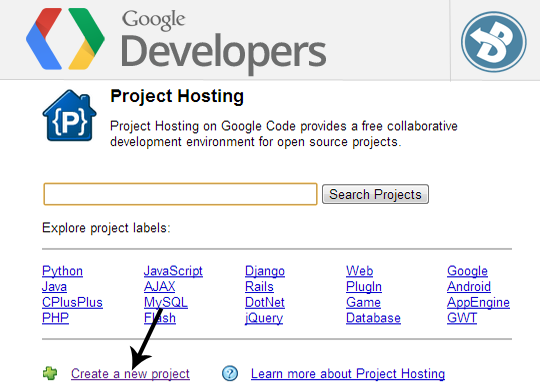
The first thing you need to do is to login into your Gmail or Google account. After logging in to your account, go to code.google.com and press “Create a new project” button present at the bottom of your screen. For more details, see the following screenshot.
Step #1: Creating a Project:
On pressing “Create a new project button” a new wizard will appear which would inquire few details about your project i.e. Project name, description, and etc. Below we have discussed each of them in a systematic order (the way they are arranged on Google code).
Project Name: In the text area, you have to write the name of your project. Keep in the mind, whatever keywords you will enter in the box would act as the URL of your development. For example, you entered "mybloggerlab" as the project name, now when you will upload files they can only be accessed through this URL mybloggerlab.googlecode.com/files/example.js. Therefore, write a unique and meaningful project name.

- Project summary: Here just write a little more about your development, it should not be more than 5 to 6 words because it is just a short summary of your plan.
- Description: Write a detailed description of your development in this area because it is not necessary otherwise you would face errors.
- Version control system: In this area you would notice three options i.e. Git, Mercurial and Subversion. Out of these three options you have to select “Mercurial”.
- Source code license: It depends on you which license you want to select for your development. However, people mostly prefer to label their project as “MIT License”.
- Project label(s): Give one or two labels to your project, so you can easily search and access them later.
Step #2: Uploading Files on Google Code:
After entering the details of your file press “create project” button and it will take you to the development dashboard which will help you to manage your assignment. To upload files, go to Downloads >> New download and upload your files.

Now enter details of your file i.e. File name, description, and etc. Select the file which you want to upload make sure its size should not be more than 200MB. Also keep in mind you get 4,096 MB total quota per project so do not exceed the limit.

Once everything is done, press the “submit file” button to upload your file correctly on the Google code severs.
Step #3: Getting the File URL:
The last step is to locate the URL of your file. On the Downloads area, you will see the file which you uploaded a few moments ago. Select the name of the uploaded file, and it would take you a new page.

On the new page again left click on the file name and select “Copy link location” or “Copy link address” depends on the browsers of different companies. This link is what you would need whenever you would try to host a file through your blogger Edit HTML section.
We hope that this guide helped you to understand how you can host your files on Google code in blogger and how it works. You may not need this guide at the moment but it near future you can always make use of it.
We hope that this guide helped you to understand how you can host your files on Google code in blogger and how it works. You may not need this guide at the moment but it near future you can always make use of it.


